Cauliflower “Couscous” with Market Vegetables

Eric Ripert is a chef who I greatly admire.  He is remarkably talented and I respect the work he has done to promote  sustainable seafood and fishing practices.

A couple of months ago, I picked up his cookbook Avec Eric which, in addition to some really wonderful recipes, talks about the journey of the ingredients from their source to the kitchen.   For each recipe, he explores different cultures and traditions from the West Coast to Europe, and then returns to his kitchen to cook a dish inspired by his travel.  I have filled the book with little Post-It tabs throughout.    He also has a program on PBS by the same name which follows the same format.  The goal is to dine at his restaurant, the three Michelin star Le Bernardin, the next time I’m in NYC, which hopefully will be soon.

He made the recipe below in one of the episodes and I was fascinated by it.  I thought it was such a gorgeous dish that showcased the freshness and brightness of the current season’s vegetables.  How creative to mimic couscous with cauliflower!  While my presentation of the dish is not as sophisticated as his (he used ring molds to layer the ingredients), I think it’s still gorgeous.

I didn’t have all of the ingredients in his original recipe, so I modified it quite a bit. For example, his recipe called for the use of argan and canola oils, whereas I used only extra virgin olive oil.  I also didn’t use nearly as much oil as the recipe indicated.  Additionally, I used balsamic vinegar.

I served this as an accompaniment to some steamed fish.

Cauliflower “Couscous” with Market Vegetables and a Balsamic Mustard Vinaigrette

(adapted from a similar recipe by Eric Ripert, which you can find here)

Serves 4

  • 1 head of cauliflower
  • 2 tbsp dried mint
  • 1 tbsp fresh parsley, chopped
  • Juice of one lemon
  • About 1/3 cup extra virgin olive oil, you probably won’t use all of it
  • 1 tbsp whole grain dijon mustard
  • 2 tbsp balsamic vinegar
  • salt and pepper
These are the veggies I used:
  • 2 carrots, peeled and sliced on the bias
  • 1/2 cup baby spinach
  • Asparagus tips
  • Baby bok choy, tough outer leaves removed
  • 1 bunch radishes, quartered
Bring a large pot of lightly salted water to a boil.

Separate each of the cauliflower florets and place the florets in a food processor and pulse until the cauliflower resembles couscous. Transfer the cauliflower “couscous” to a sauté pan, add enough water to cover the bottom of the pan and gently cook over low heat, stirring occasionally, until cooked through and most of the water has evaporated, about 5 minutes. Strain and place in a mixing bowl to cool.

Prepare the vegetables for blanching. Cook each of the vegetables in the boiling water, drain, and shock in a bowl of ice water. Transfer to a towel-lined plate and set aside.

My blanching times:

Asparagus, carrots, radishes — 5 minutes

Bok choy and spinach — 1 to 2 minutes

Season the cooked cauliflower couscous with the lemon juice, 3 tbsp olive oil, mint and parsley and set aside.

Combine the mustard and vinegar in a small mixing bowl and season to taste with salt and pepper. Drizzle in the olive oil but only enough to balance out the acidity while whisking constantly. Set aside.

Spoon the couscous onto a plate or bowl.  Place the vegetables on top and drizzle with the vinaigrette.

Serve immediately.

Homemade Ricotta

If you follow any sort of food blog, you’ll know that just about everyone has written about how easy it is to make fresh ricotta at home.  “How easy?” do you ask?  Well, let’s just say it’s ridiculously easy.  There are four steps:

  • Heat milk
  • Add acid
  • Drain
  • Enjoy

and it will leave you wondering why you would shell out money at the grocery store for this…..

….when all you need are three ingredients that you already have in your kitchen. Some recipes for ricotta call for the use of heavy cream in addition to the whole milk, but I found that just plain whole milk is just fine and results in a nice light fluffy cheese.  Plus, who needs all that additional fat in their diet?

When you’re making this cheese, after separating the curds from the whey, I found that it is much more efficient to spoon the curds into the strainer, rather than to simply pour everything in from the pot.  By spooning it in, you’ll minimize the amount of whey you put in, therefore shortening the total drainage time.  Also, the longer you drain the curds, the thicker your cheese will be.  Here was my final product.  I let it drain for about 30 minutes, and it was a nice consistency, not too thick.

This recipe is very similar to the paneer cheese that I made a while back.  As with that recipe, you can add different herbs and spices into the curds for a nice flavor.

I ended up making Eggplant Rollatini with a nice tomato sauce — not my healthiest meal due to the amount of cheese called for, but I did use less than the original recipe required.  I have included the recipe for this Eggplant Rollatini below after the recipe for the ricotta.

Homemade Ricotta Cheese

(about 2 cups)

  • 6 cups whole milk
  • 1 teaspoon kosher or sea salt
  • 3 tablespoons white wine vinegar

Set a large strainer over a deep bowl. Line the strainer with two layers of cheesecloth.

Over medium heat, bring the milk and salt to a boil while stirring occasionally.  Turn off the heat and stir in the vinegar.  Allow the mixture to stand for a minute and you will begin to see it separate into curds (thick) and whey (watery).

Pour into the cheesecloth-lined strainer and allow it to drain into the bowl at room temperature for about 20 to 25 minutes.  The longer you let it drain, the thicker the ricotta will be. Transfer the ricotta to a bowl, and discard the cheesecloth and any remaining whey. Use immediately or cover with plastic wrap and refrigerate. The ricotta will keep in the refrigerator for about 4-5 days.

.

.

Eggplant Rollatini

(serves 8)

  • 3 tbsp olive oil
  • 2 large eggplants, sliced lengthwise for a total of 16 slices
  • salt and pepper
  • 1 1/2 cups marinara sauce, jarred is fine
  • 1 whole egg
  • 1 egg white
  • 2 cups homemade ricotta
  • 3 tbsp dried oregano, parsley, or basil – or any combination of the three
  • 1 cup part-skim mozzarella cheese
  • 1/4 cup grated Parmesan
Preheat oven to 450 degrees.  Divide the oil between two rimmed baking sheets.  Arrange the eggplant slices in a single layer on the baking sheets and turn to coat in the oil; season with half of the salt and pepper.  Bake until the slices are soft and start to brown — probably about 12-15 minutes.  Remove from oven and let them cool.  Reduce oven heat to 400 degrees.
In the bottom of a 9×13 inch baking dish, spread a half cup of the marinara sauce.  In a large bowl, whisk together the eggs, ricotta, oregano/parsley/basil, parsley, 2/3 cup of the mozzarella, and  a little more of the salt and pepper.
Place about 3 tablespoons of the ricotta mixture on one end of an eggplant slice, roll it up, and transfer to the prepared baking dish. Repeat with the remaining eggplant slices and ricotta mixture.
Top the eggplant rolls with the remaining marinara sauce and the remaining mozzarella. Sprinkle with the Parmesan cheese.
Bake until the cheese has melted and the sauce is bubbling, 20 to 25 minutes. Let cool for 5 minutes before serving.

Summer’s Not Here Yet Tabouleh Salad

The weather here in the Northeast the past two days has been almost summer-like (ok, maybe very-late-spring-like).  I wanted to make something light and healthy for lunch other than a standard salad.  Luckily, I had most of the ingredients for tabouleh…or tabouli, or tabboule, or tabbouleh.

Tabouleh is a Middle Eastern salad that is traditionally made with bulgur, tomato, cucumber, and herbs.  Traditionally, it was served as part of a mezze (a selection of small dishes) served in the Mediterranean and Middle East.  There are different variations of it in Turkey and Armenia, and it has become a very popular ethnic food in the US.

Instead of bulgur, I used quinoa, which bumps up the protein a bit, but feel free to use either.  I have made this in the past also with couscous.  The one important thing, however, is to make sure you let the tabouleh sit for a few hours, or overnight, in the fridge so that the flavors can marry together.

I bet the addition of fresh basil leaves would be a nice touch to this salad also.  Perhaps next time.

Tabouleh

Probably serves about 6 people

  • 1 cup uncooked quinoa
  • 2 cups water
  • 1 cucumber, seeded and chopped
  • 1 tomato, or 20 grape tomatoes, seeded and chopped
  • 1/2 cup chopped red onion
  • 1 garlic clove
  • 1 cup fresh parsley leaves, chopped
  • 2 tbsp dried mint leaves
  • 1/4 cup extra virgin olive oil
  • Juice of one fresh lemon or lime
  • Salt and pepper to taste

Place quinoa and water in a pot and bring to a boil.  Reduce heat, cover, and simmer until all of the water has been absorbed by the quinoa, about 15 minutes.  Remove and let cool completely.

Slice cucumber lengthwise and scoop out seeds with a spoon.  Cut the cucumber and tomato into pieces about the size of a kernel of corn and place into a large bowl.  Chop onion and garlic.  Add to bowl along with the parsley and mint.

Once the quinoa has completely cooled, add to the bowl, along with the olive oil and the juice of the lemon or lime. Stir until all the ingredients are combined.  Add salt and pepper to taste.  You can serve immediately, but it will be better if you cover with plastic and refrigerate for a few hours or overnight.

Discovering Sunchokes

The other day, I found myself at a local fruit and vegetable stand where I spent a considerable amount of time looking at all the gorgeous fresh produce and flowers.  I came across a bin filled with something that resembled ginger root:

They were actually sunchokes, also known as Jerusalem artichokes.  I had heard of this root vegetable before, but was unsure how to prepare it.  I decided to buy some.  When I got home, I did a little bit of research.  Interestingly, sunchokes are part of the sunflower family, and are native to North America. Samuel de Champlain, a French explorer very well-known in the Northeast part of the country, found sunchokes on Cape Cod in the early 1600s and thought them to be similar in taste to artichokes.  He brought them back to Europe, where they became popular.  The name “Jerusalem” artichoke is thought to have evolved from “girasole,” the Italian word for sunflower, which is what it was called when cultivation of the plant had spread to Italy.

Sunchokes are often used as a substitute for potatoes by diabetics, due to their low starch content.  A note of caution, however. Don’t eat too many of these at one time, as they contain a carbohydrate that the body has a hard time breaking down, which, in some people could lead to some – ahem – unpleasant results (i.e., gassiness).  Luckily, I didn’t experience this.

I peeled the sunchokes and placed them in a bowl of cold water, as they oxidize and turn brown very quickly.  They resembled a potato, so I decided that my first attempt at making them would be in a soup. They have a very nice, earthy flavor when cooked, and made a soup so creamy (without any cream!) and delicious. There was so much flavor that the soup didn’t really require any additional herbs or spices, IMHO.

I decided I’ll buy more the next time I go to the produce stand and try some different recipes.

Sunchoke Soup with Lightly Caramelized Onions

(serves 2)

  • 3 tbsp olive oil
  • 1 small onion sliced
  • 1 shallot, finely chopped
  • 2 cloves garlic, finely chopped
  • 1 lb sunchokes, peeled and cut into chunks
  • 2 cups chicken or veggie broth or homemade stock
  • Salt and Pepper to taste

In a small pan, heat 1-2 tbsp of olive oil and add the sliced onion.  Wilt over medium-low heat, covered, and stirring occasionally. Remove the cover and continue cooking until lightly caramelized, probably about another 10-15 minutes.

In a saucepot, heat another tbsp of olive oil.  Add the garlic and the shallot and cook until softened. Do not burn.  Add the broth, the sunchokes, a dash of salt and some pepper.

Cover and bring to a boil and then turn down the heat and simmer for 45-50 minutes.  Using an immersion or upright blender, purée the soup.  Taste and adjust the seasonings as needed.

Ladle into a bowl and garnish with some of the caramelized onions.  You can also drizzle some extra virgin olive oil over the top for a little something extra.

Dolmathes / Stuffed Grape Leaves

Those of you that know me know that I come from a Greek background.  Since I have been writing this blog, more than one person has indicated on occasion that I don’t have enough Greek recipes.  Generally, my response to them has been that I want to learn and write about recipes and food from many different cultures, and not just focus on one specific type of food.

Dishes that many of us consider to be Greek are actually quite common throughout the Middle East and Turkey.  A lot of Greek cuisine has a heavy emphasis on lamb, eggplant, olive oil and heavy spices, and is actually quite similar to many Middle Eastern dishes.  There are only slight differences in some of these dishes.  A proud Greek might acknowledge the similarities, but will likely insist that these dishes originated in Greece and were then brought to the different regions.  One such dish is “dolmathes” (pronounced “dol-MA-thes”), or stuffed grape leaves.  The name comes from the Turkish word “dolma” which means “to stuff.”

A 1983 article in the New York Times about the history of grape leaves does, in fact, credit the Greeks for this dish.  It also indicates that it was most likely Alexander the Great who brought it to the Middle East when he conquered Thebes: “Food became so scarce that the Thebans cut what meat they had into little bits and rolled it in grape leaves.”  The article goes on to say that “later, it has been suggested the Byzantines refined and spiced the preparation and filled not only grape leaves but leaves of other vines as well…”  This would then justify the different variations of this dish in different cultures.

In Greek and Middle Eastern cuisine, dolmathes can be any of various stuffed vegetable dishes.  Most common, however, is a dish made of grape leaves, stuffed with a lemon-flavored mixture of rice, onion, and frequently, ground lamb.  Although you can exclude the meat and eat them cold as an appetizer with yogurt, Greek-style dolmathes with lamb are served hot as a main course with an avgolemono sauce made of egg and lemon juice.

The recipe I include below, is a variation of this.  I used ground turkey because that’s what I had.  There are so many variations to this recipe, that I suggest using whatever meats, grains (yup, even quinoa), spices, and herbs that you like.  The point is to understand the preparation and cooking technique when making dolmathes.

Dolmathes are very time- and labor-intensive to make, so if you decide to make a large quantity, they can be stored in the refrigerator for several days, or frozen.

Stuffed Grape Leaves with Avgolemono Sauce (Dolmathes Me Avgolemono)

(to be served as a main dish, probably serves about 4)

  • 1/2 jar of large grape leaves in brine
  • 1 lb ground meat of your choice
  • 1/2 cup uncooked rice
  • 1 medium onion, finely chopped
  • 3 tbsp olive oil
  • 3 tbsp dried mint
  • 2 tbsp dried oregano
  • Juice of one fresh lemon
  • Zest of one fresh lemon
  • 2 tsp salt
  • 1 tsp pepper
  • About 4 cups of chicken broth or water

Optional:  To make the grape leaves easier to work with and to remove some of the briny-ness, bring a large pot of water to a boil and then turn off the heat.  Carefully unroll the leaves (but do not separate) and place in the hot water for 2-3 minutes.  Remove the leaves and place them in a bowl and cover with cold water until they have cooled.  Place the leaves to drain in a colander.

Saute the onions and uncooked rice in 1 tablespoon of olive oil until the onions are softened, but not browned.  In a bowl, combine the onions, rice, ground meat, remaining olive oil, mint, oregano, lemon juice, lemon zest, salt and pepper.  Mix well with your hands.

Gently separate one grape leaf and place it, shiny side down, on a work surface or a large plate.  Place one heaping tablespoon of filling on the leaf at the point where the stem joined the leaf.  Fold up the bottom of the leaf over the filling, then the right and left sides towards the middle, overlapping one side over the other and pulling in a bit to make sure it’s tightly folded in.  Then roll up the leaf.  The roll should be firm, but not too tight, as the filling will expand during cooking.  Repeat until all of the filling has been used.  As you are rolling, set aside any torn leaves that are not suitable for stuffing.  You’ll use them as part of the cooking process in a different way.

Place any torn, unused leaves that you have on the bottom of the pot.  This will prevent the bottom layer of dolmathes from possibly burning.  Place the dolmathes on top, packing them closely together (but not “squished”) with the seam side facing down.  Layer them until they’re all in the pot.  Place more unused leaves on the top and press down gently in order to ensure that the dolmathes don’t unroll during cooking.  Add enough broth or water to the pot to cover about 2/3 or so of the grape leaves.

Cover and bring to a boil, then reduce the heat and continue to simmer for approximately one hour.  They’re done once the rice appears to be fully cooked.

If you’re also making avgolemono sauce, add it to the dolmathes about 10 minutes before you anticipate them to be finished cooking.

  • 2 eggs, separated
  • Juice of one lemon
  • Some hot broth/water from the pot

Beat or whisk the egg whites until foamy.  Beat in the yolks, lemon juice and 2-3 ladles of hot broth.  (Adding the hot broth to the eggs will raise the temperature of the sauce so that when you pour it into the pot, the eggs won’t curdle and become scrambled eggs.)   Continue to beat or whisk.  Carefully add the avgolemono sauce to the dolmathes and continue to cook for another ten minutes or so.

The Quinoa Project

.

I don’t know how or why I have stayed away from this grain.  I recently tried quinoa and I’m in love!  I have so many ideas as to how to begin incorporating it into everyday dishes.

Quinoa (pronounced KEEN-wah) is considered to be a “superfood.”  Nutritionally, it’s a very complete food.  It is:

  • Very high in protein
  • Full of vitamins
  • Gluten- and wheat-free
  • Cholesterol-free
  • Delicious

Quinoa comes from a plant native to the Andes Mountains in South America and has been around for thousands of years.  It contains more protein than any other grain and should be considered for vegetarians or vegans who might be concerned about the level of protein in their diets.

What does it look like?  It’s a tiny round grain with a band around it that ends with a tiny “tail.”  As it cooks, the tail unwinds and detaches itself, leaving a white ring on the grain.

There are several different varieties of quinoa and it is available in grain, flour, and flakes. Once relegated to health food stores, you can find it just about anywhere now.

Substitute quinoa in any dish calling for rice, couscous, or even pasta.  It can also be used in soups, salads, baking, and even in sweets.

One method of cooking quinoa is to treat it as you would rice.  Use two cups liquid (water, chicken/vegetable broth) to one cup of quinoa, bring to a boil, lower the heat, cover and simmer for 10-15 minutes.  Add herbs and seasoning as desired in order to make a variety of dishes.

I’ve made a few very simple savory dishes using quinoa.  At some point, though, I will also try some more complex ones, as well as a sweet dish/dessert and will post the results.  Hence the name of this article. 🙂

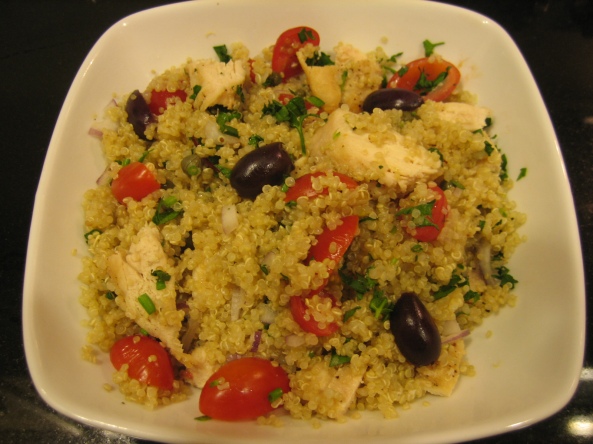
The other night, I made for dinner quinoa with roasted chicken, tomatoes, onions, parsley, and chives.   Totally healthy…and delish.

Quinoa with roasted chicken, tomatoes, olives, onions, parsley, and chives

Last night, I made some chicken, and as a side I made the dish below.  It serves 4 as a main dish, or you can halve the recipe as I did, and it will serve 4 as a nice side dish.

Stuffed Peppers with Olives and Tomatoes

(Serves 4 as a main dish)

  • 1 cup quinoa, rinsed and drained
  • 2 cups water
  • 4 peppers (green, red, yellow, or orange)
  • 1 medium red onion, chopped
  • 3 cloves garlic, finely chopped
  • 3 tomatoes, squeezed of pulp and chopped
  • 3 tbsp fresh parsley, chopped
  • 3 tbsp fresh cilantro, chopped
  • 10 Kalamata olives, pitted and chopped
  • Sea salt, to taste
  • Black pepper, to taste
  • Water
  • Extra virgin olive oil

Preheat oven to 375 degrees.

Place the quinoa in a saucepan with the water.  Bring to a boil, then reduce heat, cover and simmer for 10-15 minutes until all of the water is absorbed.

Cut the peppers in half, lengthwise.  Remove seeds and membranes.

In a bowl, mix together the cooked quinoa, onion, garlic, tomatoes, parsley, cilantro, olives, salt and pepper.  Spoon the mixture evenly into the peppers and place in a baking dish.  Pour about 1/2 inch of water on the bottom of the baking dish.  Drizzle olive oil over the peppers.

Bake for 30-40 minutes, or until the quinoa stuffing is golden brown and the peppers are soft.

Stuffed Peppers with Olives and Tomatoes

Vegetarian-in-a-Bowl

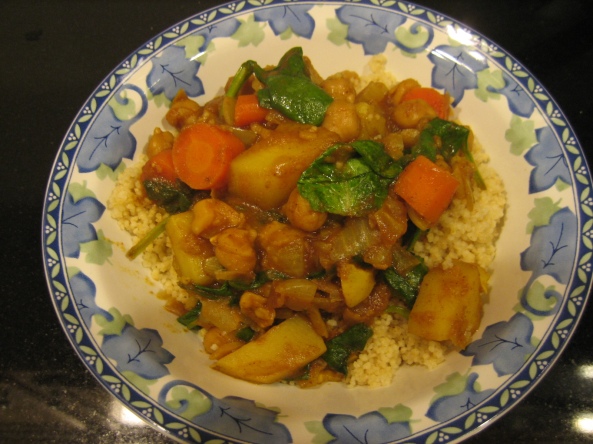
I was looking to clean out my pantry and use up some veggies that I’ve had in the refrigerator for a couple of weeks and put together this recipe.  I was craving Indian/Middle Eastern flavors (which you know I love) and put this together.  While I listed the exact ingredients I used below, you can substitute olive oil for the sesame and you can use any starch other than potato (perhaps a sweet potato or maybe a rutabaga).  I had only baby spinach, but I think kale would also be nice in this.

This is a relatively healthy dish, the only fat is in the oil, which is minimal.  The rest of the dish is vegetarian, and in fact vegan.  Adjust the spices as you like.

I served it over some whole-grain couscous for a nice meal.  Although this ideally serves two people, it is probably enough for three, as I had it for dinner, then again for lunch the next two days.

Indian Chickpea Bowl

(serves 2)

  • 1/2 onion, diced,
  • 3 cloves garlic, chopped
  • 1 tsp ginger, chopped
  • 1/2 tsp sesame oil (other oil may be substituted)
  • 1/8 tsp sea salt
  • One 15 oz can of chickpeas
  • 1 small red potato (sweet potato or rutabaga can be substituted), diced
  • 2 carrots, sliced or diced
  • 1/8 – 1/4 cup tomato paste
  • 1/2 tsp chili powder
  • 1/2 tsp cumin
  • 1/2 tsp curry powder
  • 8 oz baby spinach

Saute the onion in the oil on medium-high heat for 2 minutes.  Add the ginger and saute for another minute and then add garlic. Sprinkle the salt while cooking.

Add the can of chickpeas (including the liquid), carrots, diced potato, tomato paste and spices. Bring to a low boil. Cover and simmer for 20 minutes, or until the vegetables are soft.

Add the greens, cover and cook for 5 more minutes.

Spanakopita…Eat Greek Tonight

Spanakopita is one of the most popular snacks in Greece.  It’s relatively healthy, tastes delicious and can be eaten anytime of the day…even for breakfast…cold…yum!

I made this for Thanksgiving and it was the first thing to go.

Spanakopita

Makes two 12×9 inch pans.  Make one for now and freeze the second one.

  • 3 lbs. spinach, chopped (you can substitute frozen, thawed well)
  • 1/3 cup olive oil
  • 4 large onions, diced
  • 2 bunches green onions, diced (incl. 4 inches green)
  • 1/2 cup fresh parsley, chopped (or 3 tbsp dried parsley)
  • 1/4 tsp. ground nutmeg
  • Salt and freshly ground black pepper to taste
  • 1/2 lb. feta cheese, crumbled
  • 4 eggs, lightly beaten
  • 1/2 lb. cottage cheese (or ricotta)
  • 1/4 cup butter, melted
  • 1/4 cup olive oil
  • 1 lb. phyllo pastry sheets

Wash and drain the chopped spinach. If you use frozen spinach, thaw completely and squeeze out excess water. The spinach should be dry.

Heat the olive oil in a deep saute pan. Saute the onions and green onions until tender.

Add the spinach and parsley, and cook for 5 to 10 minutes until the spinach is wilted and heated through.  If you’re using frozen spinach, cook until the excess moisture evaporates.  The spinach mixture should be on the dry side.  Add the nutmeg and season with salt and pepper.

Remove from the heat and set aside to cool.

In a large mixing bowl, combine the feta, eggs, and cottage (or ricotta) cheese. Add the cooled spinach mixture and mix until well combined.

Combine the melted butter with the olive oil in a bowl. Using a pastry brush, grease two 9 x 12 rectangular pans.

Carefully remove the phyllo from the plastic sleeve. Most packages come in 12 x 18 inch sheets when opened fully. Using scissors or a sharp knife, cut the sheets in half to make two stacks of 9×12 inch sheets. To prevent drying, cover one stack with wax paper and a damp paper towel while working with the other.

Working quickly, Layer about 10 sheets on the bottom of the pan and brush each sheet with the butter/olive oil mixture. Add half of the spinach mixture in an even layer and press with a spatula to flatten.

Layer another 10 sheets on top of the spinach mixture, again brushing each sheet well with the butter/olive oil mixture. Repeat the process with the second pan.

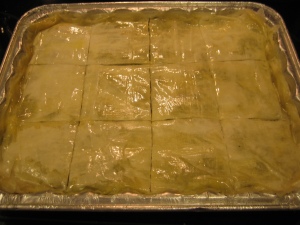
Before baking, score the top layer of phyllo (making sure not to puncture filling layer) to enable easier cutting of pieces later.

Bake in a preheated 350 degree oven until the spanakopita turns a deep golden brown. If the pita is frozen when you put it in the oven, you will need approximately 60 minutes cooking time. If it’s fresh, cook for approximately 40-45 minutes.   All ovens vary, so keep an eye on it.

Soup’s On! (Je Soupçonne)

It’s getting cold out….and if you live in the Northeast, then it’s about time! Not that I’m complaining about the 65 degree weather we are having this late in the year, but it just feels so strange to be walking outside with just a sweater in late November.

Anyway, the forecast reads mid-40s for the next few days. I know that’s amateur cold weather, but it’s still cold. So,wrap a blanket around yourself, put on a cute pair of socks and let’s make some soup!

This soup is a-maz-ing! It’s so delicious! Although the original recipe wasn’t particularly spicy, I have adjusted the amounts of the spices. However, feel free to adjust to your liking, whether it’s milder or spicier.

Je soupçonne que vous allez adorer cette soupe!

Spiced Coconut Lentil Soup

  • 2 tsp olive oil
  • 1/2 large or 1 medium onion, finely chopped
  • Pinch of red pepper flakes
  • One-inch piece of peeled ginger, minced
  • 2 cloves garlic, minced
  • 2 carrots, peeled and chopped
  • 1 cup red lentils, rinsed
  • 1 14 oz can coconut milk
  • 3 cups water
  • 1 1/2 tsp chili powder
  • 1 1/2 tsp paprika
  • 1 1/2 tsp cumin
  • Pink Himalayan salt
  • Black pepper
  • Juice of 1 lime

In a heavy saucepan, heat the oil. Add the onion, season, cover and allow to soften for several minutes. To the pan, add the minced ginger and garlic, along with the chili flakes. Cook for a few more minutes until the flavors begin to infuse.

Add the lentils and carrots along with the chili powder, paprika, and cumin. Stir thoroughly until the lentils are coated. Pour in the coconut milk and water. Taste and season with some more salt and pepper.

Cover, bring to the boil and then lower to a simmer for forty minutes, stirring frequently.

Juice the lime and set aside.

When the lentils have softened and almost disintegrated to form a thick, creamy soup, take the saucepan off the heat, pour in the lime juice, taste for seasoning, and serve with a few fresh coriander leaves or strips of lime zest for garnish.

“Everything but the Kitchen Sink” Curry (a.k.a., Thai Vegetable Curry)

There are occasions when I tend to get carried away in the produce section of the grocery store. I’m a sucker when I see beautifully arranged produce and will grab whatever looks good, which is sometimes lots.  I tend to get ambitious, thinking “Oh, with this, I will make X!”. When I get home, however, sometimes I leave my ambitions at the door.  The veggies will sit in the fridge for a while.  Oh sure, I will give them a glance whenever I open the refrigerator door and think, “Oh yeah, I need to do something with that.”

Well, the other day, I had had enough. I was tired of sneaking glances at the remaining cauliflower head I had purchased almost a month ago. And I felt guilty when I would try to ignore the beautiful yellow Daisy squash that I bought two weeks ago. If I didn’t use the veggies soon, they’d end up being frozen for the next batch of stock that I would make at some point in the future, or worse, tossed in the trash. *Gasp!*  So, what better way to use all these veggies at once than to make a yummy curry?

The word “curry” is derived from an Indian word for “sauce.”. It’s a generic description of many different dishes from Southeast Asia, including but not limited to India, Pakistan, Sri Lanka, and Thailand.

One common thread in many curry powder mixtures is turmeric, which gives curries a distinctive color. Other spices in curry powder tend to include coriander, ginger, garlic, chiles, pepper, cinnamon, cloves, nutmeg, cardamom, cumin and tamarind.  The main types of curry you might encounter in an Indian or Thai restaurant are red, yellow, and green curry. Red curry is made with red chiles, while green curry is made with green chiles. Yellow curry is made mostly with turmeric and cumin, though it may include hot peppers or pepper flakes also.

Curry paste, which is what is used in the recipe here, is a moist blend of many of the above ground herbs and spices.

This recipe can be served over steamed jasmine or brown rice.  Rice noodles would be good too.  Be creative and use whatever vegetables you may have — the recipe here lists what I had in my fridge.  The amount of curry paste listed is not aggressive and can be altered to your liking. 

This curry is totally healthy as well, with the only fat coming from the olive oil (healthy fat) and the coconut milk.  I used light coconut milk, which tends to be a little more watery than the regular version.  You can, however, thicken the sauce at the end with a little bit of cornstarch.  I served it over brown rice.

Thai Vegetable Curry

(serves 4)

  • 1 Tbsp Olive oil
  • 1 medium onion, chopped
  • 2 cloves garlic, chopped
  • 1/2 head of fresh cauliflower, cut into little florets
  • 2 medium carrots, diced
  • 1 medium yellow squash, sliced into semicircles
  • 1 medium zucchini, sliced into semicircles
  • 1/2 cup mushrooms, any type, sliced
  • 1 small red bliss potato, diced
  • 1 tsp fish sauce (or soy sauce)
  • 1.5 tsp red curry paste
  • 1 cup coconut milk (regular or light is fine)

In a large, nonstick skillet, heat the olive oil. Cook the onion until soft.  Add garlic and cook until both begin to brown, 1 to 2 minutes.

Mix the curry paste with 2 tablespoons of the coconut milk. Add the paste mixture, remaining coconut milk and fish/soy sauce to skillet. Bring to a boil. Add the all of the veggies except the mushrooms, which tend to cook very fast. Simmer until vegetables are tender, stirring occasionally, about 20 minutes.  About 10 minutes from the finish, add the mushrooms in and stir until finished.  Serve with jasmine or brown rice.

If you wish to make a thicker sauce, then continue reading:

After the vegetables are cooked and soft, remove them from the pan with a slotted spoon and keep warm.

Mix about 1 tsp of cornstarch with a little bit of water. Add to the sauce, bring to a boil, stirring until thickened.  Add the vegetables back in and serve.

The finished dish